In this tutorial, let us learn how to configure claims-based Authorization in the ASP.NET core. In the last tutorial, we showed you how to Manage Claims in ASP.NET Core Identity. In this tutorial, we show you how to use those claims to protect the apps.
Table of Contents
The claims-based authorization works by checking if the user has a claim to access an URL.
In ASP.NET Core we create policies to implement the Claims-Based Authorization. The policy defines what claims that user must process to satisfy the policy. We apply the policy on the Controller, action method, razor page, etc.
Only those users who carry claims, which satisfies the policy allowed to access the resources. Others are redirected to access denied page.
Assign Claims to Users
A Claim is a piece of information about the user. It is consists of a Claim type and an optional value. We store it in the form of name-value pair. A Claim can be anything for example Name Claim, Email Claim, Role Claim, PhoneNumber Claim, etc.
Storing Claims
A User can have any number of claims. The Identity API stores the claims in the AspNetUserClaims table. You can refer to the tutorial how to add claims to users in Identity.
Signing Users In
The Claims are added to the Authentication cookies or JWT bearer token (depending on which one you are using) when the user signs in sucessfully. You can read more about Cookie Authentication in ASP.NET Core & JWT Authentication in ASP.NET Core. The ASP.NET Core Identity uses the Cookie Authentication
These cookies or Tokens are then sent to the client along with the response. The Client needs to send them back with every request made to the server.
The Authentication cookies arrive as cookies. The browser does it automatically for us. But the JWT token needs to be stored somewhere safe by the client. It must include the token in the Authorisation Header on every request made to the server.
In ASP.NET Core, we cannot use claims directly in the Authorize attribute. But instead, we define a Policy. We map the Claim to the Policy using the RequireClaim method.
A Policy defines a collection of requirements, that the user must satisfy. We define the Policy in the ConfigureServices method of the Startup class using the AddAuthoirization extension method.
The following code creates a AdminOnly policy. The policy requires the claim Admin.
1 2 3 4 5 6 7 8 9 10 11 12 | public void ConfigureServices(IServiceCollection services) { services.AddControllersWithViews(); services.AddRazorPages(); services.AddAuthorization(options => { options.AddPolicy("AdminOnly", policy => policy.RequireClaim("Admin")); }); } |
Policy with Single Claim
The following policy creates an AdminOnly Policy. The user must have the Admin claim. The value of the Claim does not matter here.
1 2 3 | options.AddPolicy("AdminOnly", policy => policy.RequireClaim("Admin")); |
Policy with Claim & Value
The following is the ITOnly Policy, which requires the user the have a claim Permission with the value IT. The Permission claim with any other value is not allowed.
1 2 3 | options.AddPolicy("ITOnly", policy => policy.RequireClaim("Permission", "IT")); |
Policy with Multiple Claims
You can chain multiple Claims together as shown below. The SuperIT policy requires user the have Permission claim with Value IT and separate IT claim. The user must satisfy both conditions.
1 2 3 4 5 | options.AddPolicy("SuperIT", policy => policy.RequireClaim("Permission", "IT") .RequireClaim("IT")); |
Securing the End Points with Claims
To secure an endpoint, we apply the Policy using the Authorize attribute.
The following example shows how to use policy to secure the SomeSecureAction
1 2 3 4 5 6 7 | [Authorize(Policy = "AdminOnly")] public IActionResult SomeSecureAction() { return View(); } |
We create a project to create Add Claims in ASP.NET Core Identity. We will use that to test claim based authorization
1 2 3 4 5 6 | services.AddAuthorization(options => { options.AddPolicy("AdminOnly", policy => policy.RequireClaim("Admin")); }); |
Goto MVCProductsController and add the Policy AdminOnly. Note that we already have AllowAnonymous attribute on the index method. The users are able to view the list of Products, but will not be able to access the Create, Edit, or Delete Page.
1 2 3 4 5 6 7 8 9 10 11 12 13 14 15 16 17 18 19 20 | namespace AuthzExample.Controllers { [Authorize(Policy = "AdminOnly")] public class MVCProductsController : Controller { private readonly ApplicationDbContext _context; public MVCProductsController(ApplicationDbContext context) { _context = context; } // GET: MVCProducts [AllowAnonymous] public async Task<IActionResult> Index() { return View(await _context.Products.ToListAsync()); } |

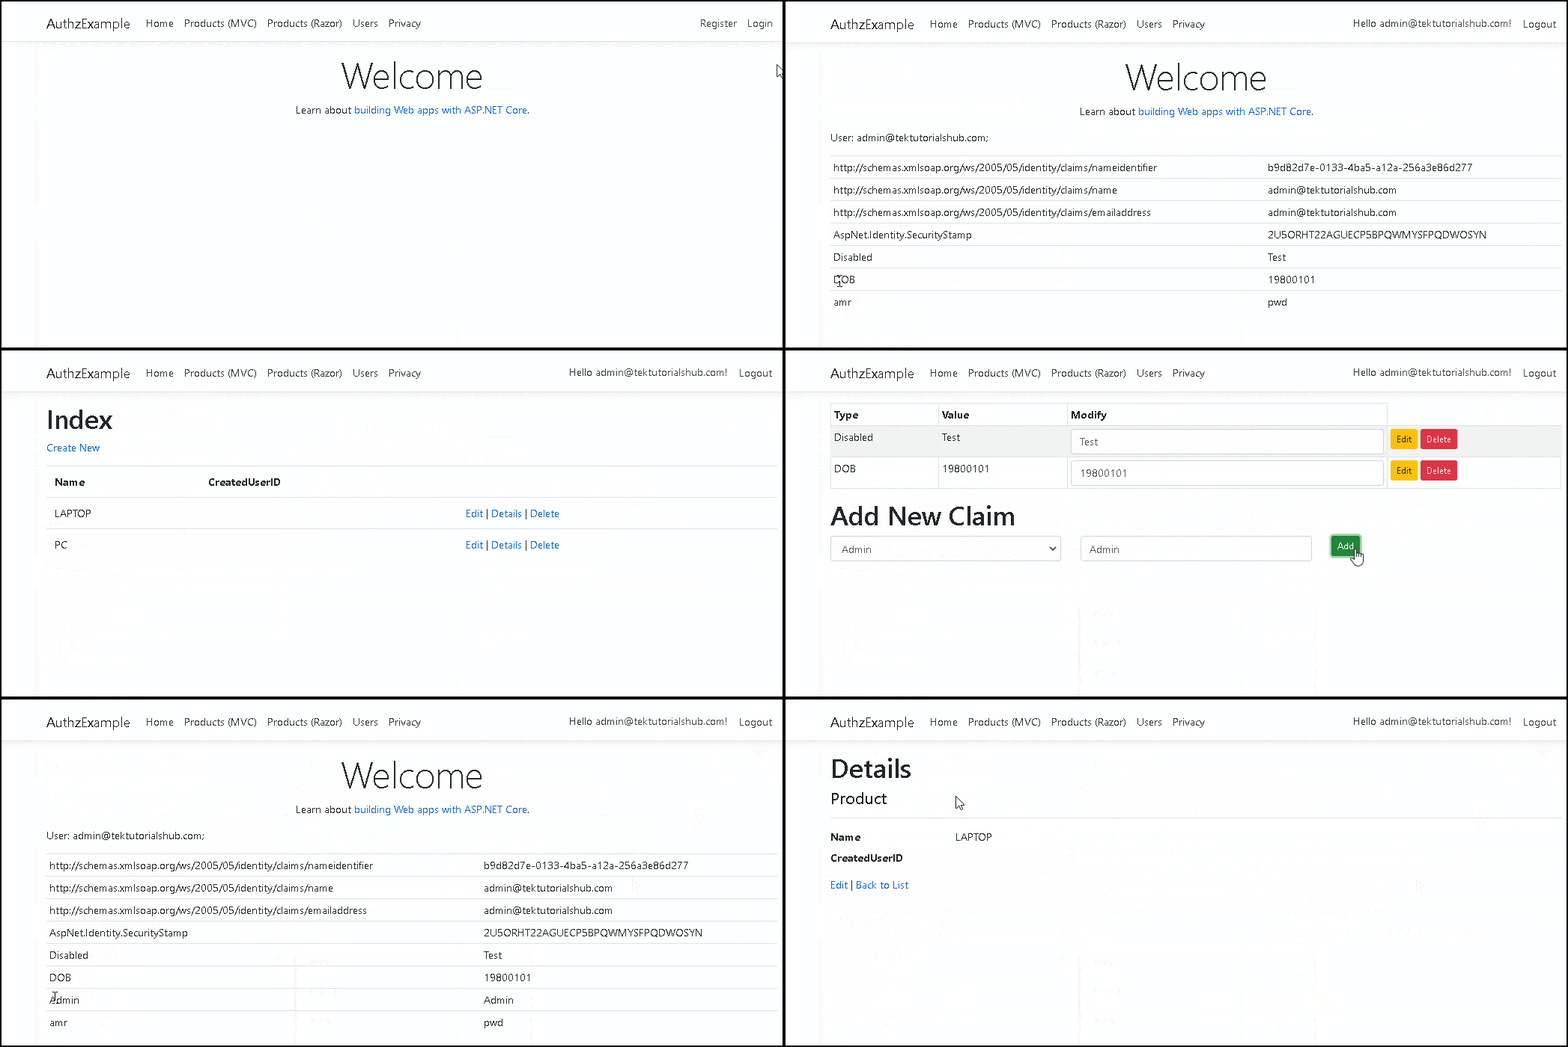
Test the app now. First Register a new user and log in and try to access the Product Details Page. You will see the Access denied page. Go to the Users page and add Admin Claim. You can give any value as you like. Because we are only checking for the Claim and not value. Log out and log in again, you will see the claims now added to the User Object.
References
Read More
- ASP.NET Core Tutorial
- Authentication in ASP.NET Core
- Cookie Authentication in ASP.NET Core
- Introduction to ASP.NET Core Identity
- ASP.NET Core Identity Tutorial From Scratch
- Sending Email Confirmation in ASP.NET Core
- Add Custom Fields to the user in ASP.NET Core Identity
- Change Primary key in ASP.NET Core Identity
- JWT Authentication in ASP.NET Core
- Introduction to Authorization
- Simple Authorization using Authorize attribute
- Adding & Managing Claims in ASP.NET Core Identity
- Claim Based Authorization in ASP.NET Core
- Policy-based Authorization
- Resource-Based Authorization


