The Layouts and sections in ASP.NET MVC core help us to maintain a consistent look across all the pages or views of our application. In this tutorial, we will learn how to create a Layout page, which is shared between the views. We will use the Renderbody to render the view. We will also see how to define sections and render it using the RenderSection. Finally, We will take a look at _viewstart to define the layout Page.
Table of Contents
The Layout of a Web Page
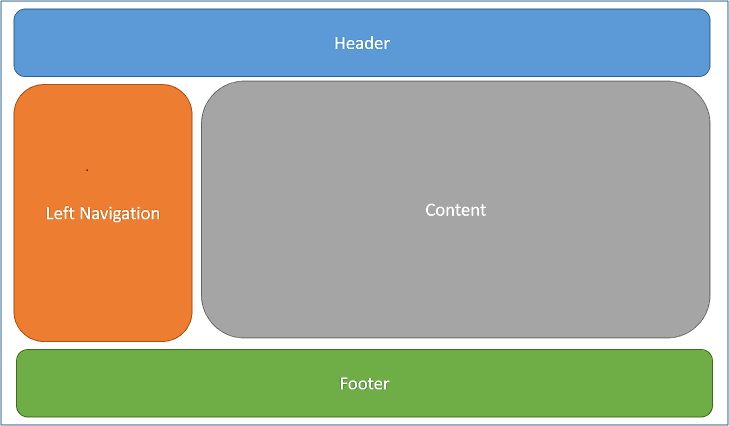
The design of the most websites includes a menu, a header, footer and sidebars. As you go from one page to another the content of the page changes. But the contents of the menu, header, footer, colour schemes do not change. This gives the web pages a consistent look.
A Typical page of an application looks as follows.

What is a Layout Page in ASP.NET Core
The Views in ASP.NET Core is rendered from the View file (.cshtml) generally located in the Views folder.
To give a consistent look to our web pages, we need to include the header, footer & navigation menu to every view. However, that is often very cumbersome and error-prone especially if you have a large number of views.
The layouts page in ASP.NET Core helps us to define the common user interface elements like header, footer & navigation menu etc on the page at one place and use it everywhere else.
Example Project
Open the ASP.NET Core app, which we created in the Building your First Web Application
You can download the code from the GitHub. The initial code is in the folder start and final code in the Layouts folder
Location of the Layout Page
By convention ASP.NET Core MVC stores all the views inside the Views folder. Each Controller gets a folder in the Views folder with the name same as the Controller but without the Controller Suffix. All the Views associated with the controller are stored in this folder.
View Locations in ASP.NET Core
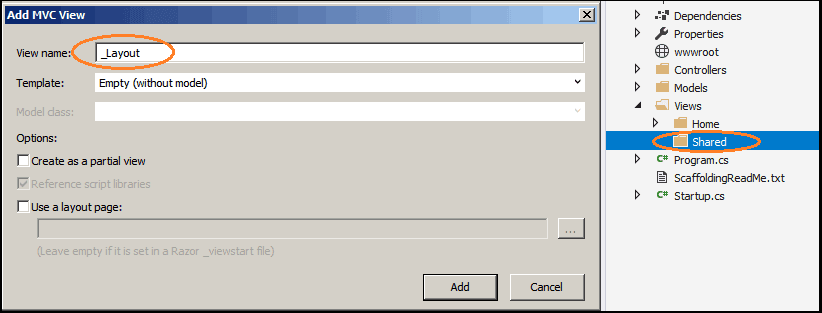
The Views folder also contains a shared folder, where views shared across multiple views are shared. Since layouts are shared across the other views, they are stores in the Views/Shared folder.
How to Create the Layout Page
Create a folder named Shared under Views folder
Right Click on the Shared folder and click on Add View
Enter the view name as _Layout.
Select the Empty Template and do not select Create as a partial view & Use a layout page as shown in the image below

Click on Add to create the View. This will create the _Layout.cshtml under the Views/Shared folder. Open it and copy the following Content.
1 2 3 4 5 6 7 8 9 10 11 12 13 14 15 16 17 18 19 20 21 22 23 24 25 | <!DOCTYPE html> <html> <head> <meta name="viewport" content="width=device-width" /> <title>Layout Example</title> </head> <body> <div id="header"> <h1>Layout example in HTML</h1> </div> <div id="content"> @RenderBody() </div> <div id="Footer"> <p>This is Footer</p> </div> </body> </html> |
This is simple HTML markup, with three sections Header, Content, and Footer. The Content is a place where we want the views to be inserted.
RenderBody
The RenderBody is a special method that marks the location where views using this layout will have their content rendered. This basically acts as a placeholder for the Views.
1 2 3 | @RenderBody() |
The only one RenderBody method can exist in a Layout page.
Specifying the Layout to Use in the View
Change the Index action method of the HomeController as below
1 2 3 4 5 6 | public IActionResult Index() { return View(); } |
Open the index.cshtml from the Views/Home folder and copy the following code
1 2 3 4 5 6 7 | @{ Layout = "_Layout"; } <p>Here goes the content</p> |
The index view has become very simpler. We have removed the <html>, <head> & <body> tags. These tags are now coming from the layout page.
The first line of code is the Razor code block, which lets us define the Layout page to use in this view.
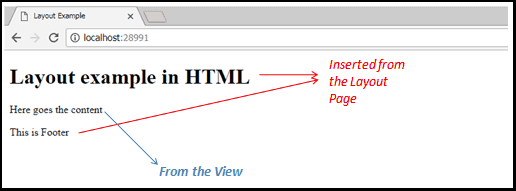
Run the app and you should see the following result

Now, let us add another Action method AboutUs in the HomeController
1 2 3 4 5 6 | public IActionResult AboutUs() { return View(); } |
Now, Add the View and select the Layout Page as shown below
1 2 3 4 5 6 7 | @{ Layout = "~/Views/Shared/_Layout.cshtml"; } <h2>About Us</h2> |
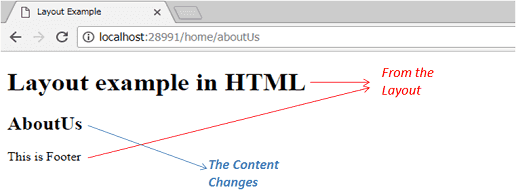
Now, run the App and go to the URL /Home/AboutUs. You will notice that the content has changed, while the header and footer filled from the Layout Page

The Layout Path
We used the full path ~/Views/Shared/_Layout.cshtml in the AboutUs View, while in index action we used the partial path _Layout.
When a Partial path is provided the Razor view engine searches for the layout file in the Views/{controller} folder first, and followed by the Shared folder. This Process is identical to the searching for the Views
Sections
The ASP.NET Core allows you to create custom sections in the layout pages. The Custom Section expects a name of the section and whether the section is required
The RenderSection(string name, bool required:false) method defines the named section.
1 2 3 | @RenderSection("footer", required: false) |
Adding a Section to Layout Page
Open the layout page and copy the following code after the content
1 2 3 4 5 | <div> @RenderSection("Test", required: false) </div> |
We have defined a section “Test” and required as false using the RenderSection method
Defining the Section in View
Now go to the Index View and copy the following code
1 2 3 4 5 6 7 8 9 10 11 | @{ Layout = "_Layout"; } <p>Here goes the content</p> @section Test { <p>Test Section</p> } |
The sections are defined with a razor block @section followed by the name of the section.
Run the app and verify that the section is displayed after the content.
Making the Section Required
Make the required:true, while defining the section in the layout page as shown below
1 2 3 | @RenderSection("Test", required: true) |
Now, run the App and query the URL /Home/AboutUs and you will see the following error message
InvalidOperationException: The layout page ‘/Views/Shared/_Layout.cshtml’ cannot find the section ‘Test’ in the content page ‘/Views/Home/AboutUs.cshtml’.
That is because we haven’t defined the test section in the AboutUs View
_ViewStart
In the above examples, we defined the layouts to use in the View itself. defining the layout in every view is harder to maintain. The simpler way is to define the layout in the _ViewStart.html file
The purpose of the _ViewStart.cshtml is to set up default values to the other Views in the folder and its subfolders.
Now, go to the Views folder and create a view _ViewStart under the folder Views and copy the following code
1 2 3 4 5 | @{ Layout = "_Layout"; } |
Remove or comment out the above code from the index and AboutUs View.
Run the app and check yourself
Removing the Layout from a View
Since we added the _viewStart at the root of the Views folder, the layout becomes applicable to every view under root folder and all its subfolder
There are circumstances where you may not want to use a layout or may want to use another layout for a specific page. In such cases just add the Layout back and set it to Null
1 2 3 4 5 | @{ Layout = null; } |
Or set it to Some other Layout as shown below.
1 2 3 4 5 | @{ Layout = ‘_someOtherLayout’; } |
You can also create a separate _viewStart file under the Controller folder, which will override the _ViewStart settings from the parent folder
Summary
We have learned how to create a layout page and share the common UI elements across the various views in our Application. The Renderbody method renders the main View, while we can use the RenderSection to load any other UI elements. Finally, We looked at how to specify the layout page in the _viewstart to so that it can be shared by all the Views.


